Oh, hi there! Do I know you? Have we met? Oh, right…. way back in December we spoke about fancy wreaths and crafts and such. Then I kinda bailed for about eight or nine months. But let’s not talk about that. No use living in the past. Today, I’d like to introduce you to my new best friend. She’s practical and good-looking. Two very important qualities in a bestie in my opinion.
Ladies and gentlemen (?), let me introduce you to my pantry:
Whenever I walk past I hear Stevie Wonder singing softly in the background. Yes, Mr. Wonder. She’s totes lovely.
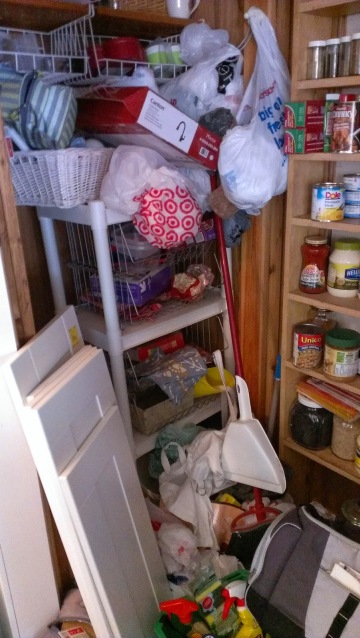
No ‘reveal’ post would be complete without a horrific ‘before’.
Ummm…. yeah. I originally didn’t want to show this photo. It’s full-on Hoarders, I know. The funny part is that this was only concealed from my kitchen by a a pair of curtains I temporarily (for a year) hung.
People would come over and sit in the kitchen and casually ask what was in there and I’d break into a cold sweat. It was like the scene from the Wizard of Oz – “Pay no attention to that man behind the curtain!” What curtain? I don’t see anything! Here! Have more coffee! Some quinoa salad or something! Look! Elvis!
The WORST part was when the boys had friends over. For some reason, every kid that entered my house insisted on playing hide and seek in that damn pantry. They’d go running for the curtain not realizing that they were about to run right smack into twelve bottles of ketchup on the floor and six ceramic pie plates I bought on clearance for future Christmas gifts. Ha. Joke’s on them. That’ll learn ’em.
I knew I couldn’t go on like this any longer. We needed some semblance of organization and it needed to happen STAT. When we demo’ed the kitchen this past summer (complete kitchen post comin’ atcha), we saved every scrap of 3/4″ plywood we could with the hopes of reusing it later. Well, later was now.
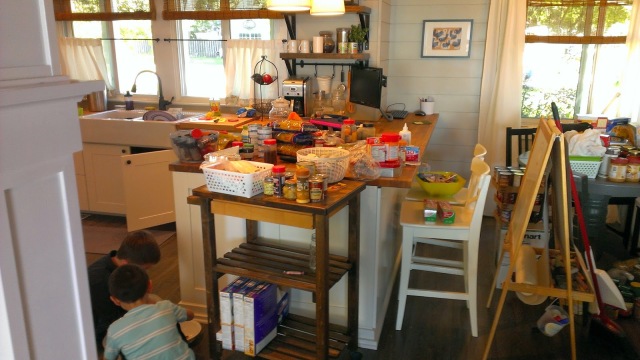
I started by taking everything out of the pantry and randomly throwing it around the kitchen in the most haphazard way possible. That always lowers my blood pressure.
We found lots of hidden treasures – like a Tupperware bowl full of peanuts that the boys proceeded to eat off of the floor like a couple of refugees.
Once I had it cleared out, I could assess the damage and figure out my game plan. I’ve been hoarding Adel cabinet fronts from Ikea for a couple years now and I’ve amassed a pretty impressive collection.
I figured out what doors I had, what cabinet frames I needed to buy to match them up and went from there. One side of the pantry was exactly 36″ wide and I had 36″ drawer fronts already on hand (all but the top, little ones), so I chose the wide, deep drawers for storing things like lunch bags, cooler bags and miscellaneous pantry crap that never seems to find a home anywhere else in the kitchen. I also had a couple 39″ doors for the upper cabinets, so I purchased a tall wall cabinet to fit above the drawers.
There was a 6″ gap to the left of the wall cabinet, so I built a little bottle holder out of scrap mdf and melamine-covered particle board to fit perfectly in that spot and to add a little storage at the same time.
Once I had that side roughed in, I could get to work on building some storage into the other side of the pantry. John had the amazing idea to use an old hollow-core door to create the divider down the almost-center of that old closet space.
I opted to cover the doorknob holes with more scrap trim and just started building from there as my guide. As you can see, I had to work around the hvac duct on the bottom – that posed a little bit of a challenge, but nothing a little scrap mdf couldn’t handle.
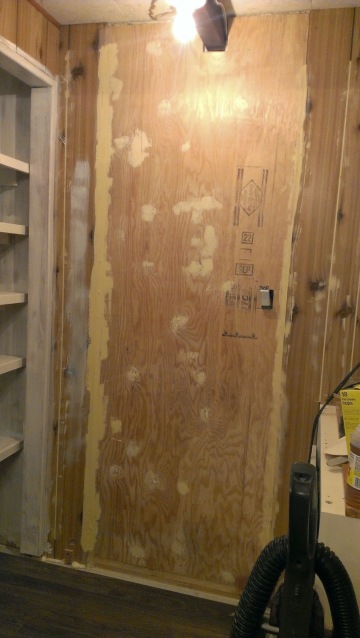
The one thing that was causing my psoriasis to act up was that big opening on the back wall and how I was going to get that covered up and looking even with the rest of the paneling. Up until that moment, my plan had been to paint out all of the fake paneling and give it a bit of a country cottage charmy feel. In order to do that, I was going to have to buy another piece of ugly paneling (that isn’t even sold anymore around here) for about $27-$35. I was bummin’ hard because I had my heart set on doing this whole pantry renovation with minimal costs and reusing as much as I could. Then, John had the BRILLIANT idea to use some old wallpaper that I had been hoarding (just shut up, it obviously pays off) years ago on clearance from Lowe’s. The poor guy hadn’t even finished his sentence before I was practically running to the garage to scout out a crappy piece of plywood to patch the big ol’ hole in my wall.
I patched up the knots and the unevenness of the whole thing because it didn’t match up perfectly with the wall on either side. I read up quite a bit on whether I should prime the plywood first, use wallpaper size or just impulsively slap the wallpaper on with paste. I’ll let you guess what option I went with. I figured the worst-case scenario was that the wallpaper wouldn’t adhere properly and then I’d just redo it because it doesn’t take a ton of paper in the first place. So, I got to rollin’ out my paper and matching the pattern.
Then, I drew a level vertical line on the wall, slopped on a crapload of paste and got to work.
Oh, man. What a difference that made. I wasn’t sure how John would feel about the floral wallpaper but he seems to dig it just told me that it looks like “giant grandma curtains”. Let’s be honest, ANYTHING is better than what this pantry looked like before.
Keeping with the spirit of reusing what we have, I grabbed some shelves that were originally in the pantry/closet and some scrap boards to make the countertop for the drawer cabinet.
Once I got some trim sliced and diced and slapped some more wallpaper (beadboard style) on the ceiling tiles, this puppy really came together.
I have a couple more bits of trim and hardware to add and I’m still waiting for the top drawers to come in, but as of now, I think it’s looking pretty sweet and way less hoardish. It’s been really nice to be organized for the back-to-school rush and routines. And for all of the hide and seek.

